Blog
- Home
- Blog
![](https://leogilson.in/wp-content/uploads/2024/01/copy-800x450.png)
Don’t Get Hacked: Tips for Protecting Your Personal Information Online
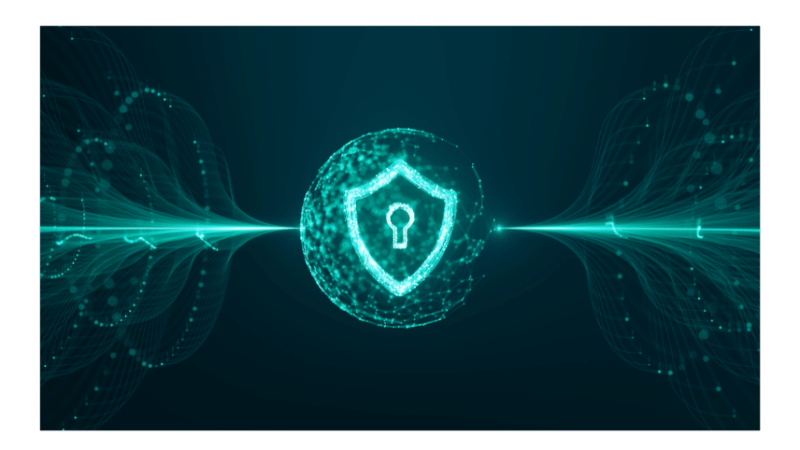
How to Keep Your Personal Information Safe in the Digital World?
In the digital age, it’s crucial to be aware of the risks associated with sharing personal information online. With data breaches, hacking, and cyber attacks becoming increasingly common, it’s important to take steps to protect your information. Whether you’re using social media, shopping online, or accessing bank accounts, here are some ways to safeguard your personal information when you’re online.
-
-
Use Strong Passwords and Two-Factor Authentication
-
The first line of defense in protecting your personal information is to use strong passwords and two-factor authentication. A strong password should be at least 12 characters long and contain a combination of letters, numbers, and symbols. Avoid using the same password for multiple accounts, as this makes it easier for a hacker to gain access to all your accounts if one password is compromised.
Two-factor authentication is an additional security layer that requires a second form of identification, such as a code sent to your phone or email, to access your account. This makes it much harder for hackers to access your information, even if they have your password.
-
-
Be Careful about What You Share Online
-
Another way to protect your personal information is to be mindful of what you share online. Avoid posting sensitive information such as your full name, date of birth, home address, and financial information on social media and other public websites. Also, be cautious when sharing personal information in online forums and only share information on trusted websites.
-
-
Use Anti-Virus Software
-
Using anti-virus software is essential in protecting your personal information from malicious software, such as malware and spyware. Anti-virus software can also help prevent your computer from becoming infected with viruses and other forms of malware that can steal your personal information and compromise your security.
-
-
Keep Software and Security Updates Up to Date
-
Regularly checking for software and security updates is important in protecting your personal information. Updates often contain important security patches that can help protect you from hackers and other malicious actors. Make sure to check for updates regularly and install them as soon as they become available.
-
-
Be Wary of Phishing Scams
-
Phishing scams are a common tactic used by hackers to steal personal information. These scams typically involve emails or links that appear to be from trusted sources but actually lead to malicious websites. To protect yourself from phishing scams, be cautious when receiving emails or clicking on links from unknown sources. If you’re unsure, always verify the sender and link before entering any personal information.
-
-
Use a Virtual Private Network (VPN)
-
A virtual private network (VPN) is a useful tool for protecting your personal information when you’re online. A VPN encrypts all the data you send and receive, making it much harder for hackers to access your information. A VPN can also help protect you from online tracking and data collection by websites and advertisers.
-
-
Be Careful with Public Wi-Fi
-
Using public Wi-Fi can be convenient, but it can also be dangerous if you’re not careful. Public Wi-Fi networks are often unsecured, which makes it easy for hackers to access your personal information. To protect yourself, avoid accessing sensitive information when using public Wi-Fi, and make sure your anti-virus software and other security measures are up to date.
-
-
Use Privacy Settings on Social Media
-
Social media is another area where it’s important to protect your personal information. Make sure to adjust your privacy settings to limit the information you share and who can see it. Be mindful of the information you post and only share information that you feel comfortable making public.
![](https://leogilson.in/wp-content/uploads/2024/01/windows-11-g62d09090f_1920-1024x768-1-800x450.jpg)
8 Fixes for Windows 11 Taskbar Not Working or Not Showing
Are you experiencing problems with your Windows 11 taskbar not working or not showing? You’re not alone. Many Windows 11 users have reported this issue, and it can be quite frustrating. In this blog post, we’ll go over eight possible fixes for this problem.
Restart Windows Explorer
One of the first things to try when the taskbar isn’t working is to restart the Windows Explorer process. This can be done by pressing the Ctrl + Shift + Esc keys to open the Task Manager, then find “Windows Explorer” and click “Restart” at the bottom right.
Check for updates
Make sure that your Windows 11 is up to date. Go to Settings > Update & Security > Windows Update and check for any updates that need to be installed.
Run the built-in troubleshooter
Windows 11 includes a built-in troubleshooter for taskbar problems. Go to Settings > Update & Security > Troubleshoot, then find “Taskbar” and run the troubleshooter.
Unpin and repin taskbar icons
Sometimes the problem can be caused by a specific icon on the taskbar. Try unpinning all of the icons from the taskbar and then repin them.
Clear the icon cache
The icon cache can sometimes become corrupted, causing issues with the taskbar. To clear the icon cache, open the Run dialog box (press the Windows key + R), type “explorer /cleanupiconcache” and press Enter.
Reset the taskbar
You can also try resetting the taskbar to its default settings. Go to Settings > Personalization > Taskbar, and click on the “Reset” button.
Run System File Checker
System File Checker (SFC) is a utility in Windows that allows users to scan for corruptions in Windows system files and restore corrupted files. Open the Command Prompt as administrator, type “sfc /scannow” and press Enter.
Reinstall or Repair Windows
If none of the above methods work, you may need to reinstall or repair Windows 11. This can be done by going to Settings > Update & Security > Recovery and selecting “Get started” under the “Reset this PC” option.
Conclusion:
These are eight possible fixes for the problem of Windows 11 taskbar not working or not showing. Try these methods one by one and you should be able to fix the issue. If you continue to have problems, it may be best to contact Microsoft support for further assistance.
![](https://leogilson.in/wp-content/uploads/2024/01/172251-windows-picture-microsoft-hq-image-free-800x450.png)
Become a Power User with Windows Shortcut Keys
Windows shortcut keys are a great way to increase productivity and navigate your computer more efficiently. These keyboard shortcuts allow you to perform common tasks with just a few keystrokes, saving you time and effort. In this blog post, we will cover some of the most useful Windows shortcut keys that can help you work smarter, not harder.
-
Windows + D: This shortcut key will take you to the desktop instantly, no matter where you are in the operating system.
-
Windows + E: This shortcut key opens the File Explorer, allowing you to quickly access files and folders on your computer.
-
Windows + L: This shortcut key locks your computer, keeping your work secure when you step away from your desk.
-
Windows + R: This shortcut key opens the Run dialog box, which allows you to quickly launch programs and access system settings.
-
Windows + T: This shortcut key cycles through the open apps on the taskbar, allowing you to switch between them quickly.
-
Windows + Tab: This shortcut key opens the Task View, which allows you to switch between open apps and virtual desktops.
-
Alt + Tab: This shortcut key allows you to switch between open apps and programs.
-
Ctrl + Alt + Del: This shortcut key opens the Task Manager, which allows you to view and manage running programs and processes.
-
Ctrl + C: This shortcut key copies selected text or an image.
-
Ctrl + V: This shortcut key pastes the copied text or image.
-
Ctrl + Z: This shortcut key undoes the last action.
-
Windows + X: This shortcut key opens the Quick Link menu, which provides quick access to frequently used system tools and settings.
Conclusion:
Windows shortcut keys are a powerful tool that can help increase productivity and navigate your computer more efficiently. It’s important to practice these shortcuts regularly to master them. By mastering these shortcuts, you’ll find yourself working faster and smarter in no time. Remember, these shortcuts can be used in different applications and programs, not only in the Windows system.
![](https://leogilson.in/wp-content/uploads/2024/01/Repair-corrupted-memory-card-or-Pendrive-1-1024x576-1-800x450.png)
Repair corrupted SD card/Pendrive format drive using CMD
A corrupted memory card or pendrive can be frustrating, especially when you have important files and data stored on it. However, there’s no need to panic, as there are ways to repair the corrupted drive and retrieve your data. In this blog post, we will show you how to repair a corrupted memory card or pendrive using the Command Prompt (CMD).
Why Memory Card/Pendrive gets corrupted:
Corrupted memory cards and pendrives can be caused by a variety of reasons such as a faulty USB port, a bad sector on the drive, or a virus infection. Regardless of the cause, the end result is the same – you can’t access your data.
Formatting the drive using CMD:
One of the ways to repair a corrupted memory card or pendrive is to format it using the Command Prompt (CMD). This will erase all the data on the drive and repair any errors on the file system. Here’s how to format a drive using CMD:
-
-
- Connect the memory card or pendrive to your computer.
- Press the “Win + R” keys and type “cmd” in the Run box.
- Press “Enter” to open the Command Prompt.
- Type “diskpart” and press “Enter.”
-
diskpart
5. Type “list disk” and press “Enter” to view all the connected disks.
list disk
6. Type “select disk X” (X represents the number of the disk you want to format) and press “Enter.”
select disk (Enter No.)
7. Type “clean” and press “Enter” to delete all the partitions on the disk.
clean
8. Type “create partition primary” and press “Enter” to create a new partition.
create partition primary
9. Type “active” and press “Enter”
active
10. Type “select partition 1” and press “Enter” to select the new partition.
select partition 1
11. Type “format fs=ntfs” and press “Enter” to format the partition as NTFS.
format fs=fat32
![](https://leogilson.in/wp-content/uploads/2024/01/Screenshot-105-300x232.png)
Conclusion:
Formatting a corrupted memory card or pendrive using CMD is an effective way to repair the drive and retrieve your data. However, it’s important to note that this method will erase all the data on the drive, so make sure to backup important files before formatting. Remember to always safely eject the device before unplugging it.
YouTube